Posting an article on your blog with only text looks boring and it doesn't help in grabbing the attention from your readers. That's why I have put together a list of image resources and tools so you can turn your articles into attention grabbing content that will keep your readers on your website.
Remember that Google since recently increased the importance of a low bounce rate as a ranking indicator. The longer visitors stay on your website, the lower your bounce rate will be so this will improve your organic ranking as such.
You know what they say, a picture is worth a thousand words. I often get asked the question, where can I find good royalty free images? Which tools can I use to make my images unique?
If you don't have the time or the interest to search and design your own images you can always use a great design service like 99design but that's entirely up to you of course.
In this article I want to share my top sources to find royalty free images for your WordPress blog posts and the tools I use, so you can make your content stand out.
I know there are many more image resources out there besides the ones in my list but I want to share what I have experienced as being the most useful and free which I use on a daily basis.
We all know it's easy to build a list of at least 100 or more image tools and image resources but for me personally I don't see the need .
Let's start with the image resources


They offer copyright-free, cost-free images with no attribution required. You can copy, modify, distribute and use their images, even for commercial purposes. The images are sorted into categories and tags and they have an advanced search function available. No registration is required.
Another well-known destination with lots of great images available on this website which are also free under the Creative Common license. Sign up is available but not necessary.
3.Pexels
One of the best image resources I think, Pexels adds 20 new pictures each day all free to use on your website. You can even bookmark images for later on if you want to.
Like the name says, free images available in 16 different categories. They have a very good advanced search function . Freedigitalphotos has a free and paid option, with the free download you have to give attribution in your article.
They have free and premium images available. I don't use Freeimages much but once in a while, you find something useful for free in their database. Unfortunately, most images are premium on this website.
What I like about Freerangestock besides the fact that they have great images available is that they have 30 different categories. So if you need something out of the ordinary here is the place to look.
This is a repository for a wide variety of free public domain images uploaded by amateur photographers. A brief signup is required. (Premium download is an option if you need larger images.)
8.Picjumbo
This one offers a variety of free photos for any kind of use—free of charge with no registration required. Picjumbo has no search function but categories will help you find your way around.
This is kind of a photo search engine clearinghouse that offers access to search services provided by other organizations like Flickr and Google.
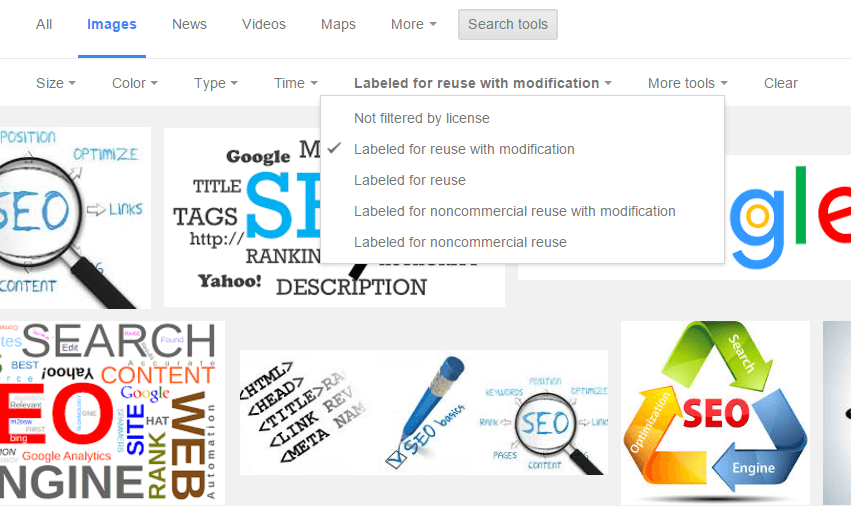
For example, searching for “ SEO” on Creative Commons Search and selecting Google Images brings me here. Note that the search has been set up with special parameters.


10.Google Advanced Image Search
If you want to search directly in Google for free images you will have to use an advanced search so you don't end up using copyright protected images which will get you in trouble. A detailed guide on how to do an advanced search can be found here.
Tools to create unique images
Now that we have found our images we should make them unique so they will stand out.For this, I use a few different tools. Let me tell you how I do this on Bizwebjournal in this order.
1.Canva
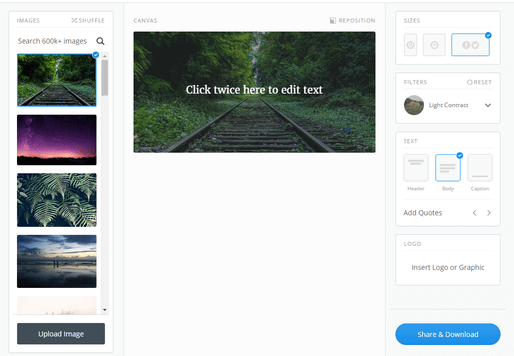
This one is my favorite tool to make my graphic designs unique.It's very simple to learn which I consider it to be very important and it's also free. It doesn't take long to design something and they have a lot of tools available such as icons or graphs.
2.Pablo


This is a free tool from Buffer which I also use once in a while if I want to do something very fast. It's also very easy if you want to share your image immediately on Twitter or Facebook.If you want to do a quote tweet, for instance, I recommend you always put the text on an image.
As we all know you get far better results when using images in your Tweets. With this tool from Buffer, it will only take you like 2 minutes to create something nice and catchy.
3.Screenshots
I like to use a lot of screenshots to explain something in my articles, we all know that an image says more than a 1000 words. I prefer to use 2 tools called Jing and Nimbus. Jing is faster if you only need a screenshot and sits on top of your desktop screen, Nimbus is a chrome extension and a great tool if you want to add arrows and text to your screenshots
If you want to create interactive images for your website this is definitely the right tool.You can make your images come alive with video,text,music and more if you want. This way you can pack a lot of content in a small space.
When my image is ready I always use this tool to resize my image. For instance, I use 800 by 340 for my featured images and 600 x 300 for my other images I place in my articles. You can use it with JPEG or PNG format images, whichever you prefer and you can also set what the result should be, upload a JPEG and download a PNG is possible with this tool or the other way around.
6.Image Compression
It's very important these days that you have a very fast loading speed for your website. As this is considered as one of the most important ranking factors by Google. Keep your website loading time under 4 seconds at all times or your bounce rate is going to go thru the roof. Visitors have become very impatient, I know.
I also have a WordPress plugin installed called WPsmush so very image I upload is compressed but even then I always compress my images before upload so the image size is as small as possible without losing image quality of course.
For image compression I always use TinyPNG, just drop in your PNG or JPEG file and in a few seconds you get a compressed image 60 to 70% smaller than the original image ,that's a lot of kilobytes in the long run. With 3 to 4 images on each post we are talking about 1 MB easily per article.
That's it, you are all set to go and create stunning images for your website. Do you know of any resources I should add? Please let me know in the comments below and I will be happy to add them to the post. Feel free to bookmark this page for later reference.


